一步一步学android控件(之三) —— Button
android 控件众多 , 额 , 具体多少个呢? 貌似有那么几十个吧,也没做个统计,嘿嘿!......
有木有朋友感觉写了那么长时间的android代码,有时候想写点自己的东西的时候却发现自己好像离不开网络耶,什么都需要先到网络上遨游一番才能解决自己的问题。思前想后,个人觉得还是有必要巩固一下自己学习过的东西——想想以前这些东西,自己都写过一遍了,但是折腾一段时间下来都不知道放哪里去了........
好了,废话不多说了,这次准备重新学习一下android的常用控件TextView、EditText、AutoCompleteTextView、Button、CalendarView、CheckBox、Chronometer、CompoundButton、DatePicker、DigitalClock、ExpandableListView、Gallery、GridView、HorizontalScrollView、ImageButton、ImageSwitcher、ImageView、ListPopupWindow、ListView、MultiAutoCompleteTextView、NumberPicker、PopupMenu、PopupWindow、ProgressBar、QuickContactBadge、RadioButton、RadioGroup、RatingBar、RemoteViews、ScrollView、SearchView、SeekBar、SlidingDarwer、Switch、TableHost、TextClock、TextSwitcher、TimePicker、Toast、ToggleButton、VideoView、ViewFlipper、ViewSwitcher、ZoomButton等控件。
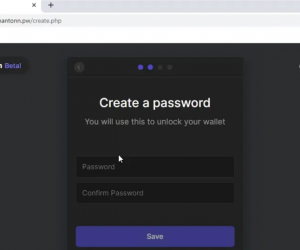
今天学习Button控件,button的相关属性如:style、android:text 、android:gravity 、 android:layout_weight 等就自己去研究,今天主要讲一下自定义button背景和selector的使用。先看一看效果图(注意:本文中的代码写在工程SelfDefineWidget中),具体内容参见一步一步学android控件(之一) —— 开始篇
目前看到途中的效果是点击了“使用自定义的Drawable定义button背景” 后的效果。
使用button常常需要我们使用selector,所以本文中所有自定义button背景都使用自定义的selector。
由于Button中的字体和TextView中的字体变化方法类似,这里就不在做了。本文主要涉及到使用单一颜色定义Button背景和自定义Drawable定义背景。从上图中看到有两个按钮:
1、点击按钮 “使用单一色定义button背景”, 将看到一个以 颜色#BBBBBB为背景的button。
2、点击“使用自定义的Drawable定义button背景”看到如图效果——是一个自定义的drawable对象,详细内容见下文。
上述自定义的背景也可以在layout文件中使用android:background 属性指定。
下面就一步一步实现上述功能(对下述内容有疑问的请参见一步一步学android控件(之一) —— 开始篇)。
1、在strings.xml文件中添加需要的字串,
[html]
<!-- strings for Button -->
<string name="default_Button_str">这是默认的Button的样式</string>
<string name="customer_bg_color_str">使用单一色定义button背景</string>
<string name="customer_bg_drawable_str">使用自定义的Drawable定义buton背景</string>
<!-- end -->
2、在widget_color.xml(该文件的创建参见 一步一步学android控件(之二) —— TextView)添加如下颜色值
[html]
<color name="button_normal_color">#BBBBBB</color>
<color name="button_focused_color">#333333</color>
<color name="button_pressed_color">#CC6633</color>
<color name="button_drawable_normal_start">#666666</color>
<color name="button_drawable_normal_center">#9966CC</color>
<color name="button_drawable_normal_end">#666666</color>
<color name="button_drawable_focused_start">#CC66CC</color>
<color name="button_drawable_focused_center">#990033</color>
<color name="button_drawable_focused_end">#CC66CC</color>
<color name="button_drawable_pressed_start">#99CC00</color>
<color name="button_drawable_pressed_center">#FF3300</color>
<color name="button_drawable_pressed_end">#99CC00</color>
3、在res/layout目录创建button_detail.xml,内容如下
[html]
<?xml version="1.0" encoding="utf-8"?>
<RelativeLayout xmlns:android="http://schemas.android.com/apk/res/android"
android:layout_width="match_parent"
android:layout_height="match_parent"
android:gravity="center_horizontal" >
<LinearLayout
android:id="@+id/linearLayout1_button"
android:layout_width="match_parent"
android:layout_height="wrap_content"
android:layout_alignParentLeft="true"
android:layout_alignParentTop="true" >
<Button
android:id="@+id/customer_bg_color"
style="?android:attr/buttonStyleSmall"
android:layout_width="wrap_content"
android:layout_height="wrap_content"
android:text="@string/customer_bg_color_str" />
</LinearLayout>
<LinearLayout
android:layout_width="match_parent"
android:layout_height="wrap_content"
android:layout_below="@+id/linearLayout1_button" >
<Button
android:id="@+id/customer_bg_drawable"
style="?android:attr/buttonStyleSmall"
android:layout_width="wrap_content"
android:layout_height="wrap_content"
android:text="@string/customer_bg_drawable_str" />
</LinearLayout>
<Button
android:id="@+id/show_button_detail"
android:layout_width="match_parent"
android:layout_height="wrap_content"
android:layout_alignParentBottom="true"
android:layout_marginBottom="100dp"
android:singleLine="true"
android:text="@string/default_Button_str" />
</RelativeLayout>
其中show_button_detail是用来显示效果的button,即上图中最底端的button。
4、基本布局文件创建好后,就该添加进入到该界面的控件和事件响应
4.1 创建activity——WidgetButtonActivity.java
[java]
package com.xy.zt.selfdefinewieget;
import android.app.Activity;
import android.os.Bundle;
import android.view.View;
import android.view.View.OnClickListener;
import android.widget.Button;
public class WidgetButtonActivity extends Activity implements OnClickListener{
private Button mBgColor ;
private Button mBgDrawable ;
private Button mShowBtn;
@Override
public void onCreate(Bundle savedInstanceState) {
super.onCreate(savedInstanceState);
setContentView(R.layout.button_detail);
init();
}
private void init(){
mBgColor = (Button) findViewById(R.id.customer_bg_color);
mBgColor.setOnClickListener(this);
mBgDrawable = (Button) findViewById(R.id.customer_bg_drawable);
mBgDrawable.setOnClickListener(this);
mShowBtn = (Button) findViewById(R.id.show_button_detail);
}
public void onClick(View v) {
switch(v.getId()){
case R.id.customer_bg_color:
mShowBtn.setText(R.string.customer_bg_color_str);
mShowBtn.setBackgroundResource(R.drawable.widget_button_pure_color);
break;
case R.id.customer_bg_drawable:
mShowBtn.setText(R.string.customer_bg_drawable_str);
mShowBtn.setBackgroundResource(R.drawable.widget_button_drawable);
break;
}
mShowBtn.invalidate();
}
}
activity中的内容很简单,对两个按钮 mBgDrawable 和mBgColor 做点击响应,用mShowBtn显示定义的效果。
4.2 在ViewData.java 指示将要学习button控件的资源,添加button后ViewData内容如下:
[java]
package com.xy.zt.selfdefinewieget.data;
import java.util.ArrayList;
final public class ViewData {
public final static ArrayList<ViewData> View_Datas = new ArrayList<ViewData>();
public static final int TEXT_VIEW_ID = 90000;
public static final String TEXT_VIEW_NAME = "TextView";
public static final int BUTTON_ID = TEXT_VIEW_ID + 1;
public static final String BUTTON_NAME = "Button";
private static final ViewData mTextView = new ViewData(TEXT_VIEW_NAME,
TEXT_VIEW_ID);
private static final ViewData mButton = new ViewData(BUTTON_NAME, BUTTON_ID);
public final String mViewName;
public final int mViewId;
private ViewData(String name, int id) {
mViewName = name;
mViewId = id;
}
static {
View_Datas.add(mTextView);
View_Datas.add(mButton);
}
}
4.3 资源添加好了后到WidgetsAdapter.java中添加事件响应内容,handleItemClicked函数内容变为如下:
[java]
private void handleItemClicked(int action) {
Intent intent = new Intent();
switch (action) {
case ViewData.TEXT_VIEW_ID:
intent.setClass(mContext, WidgetTextView.class);
mContext.startActivity(intent);
break;
case ViewData.BUTTON_ID:
intent.setClass(mContext, WidgetButtonActivity.class);
mContext.startActivity(intent);
break;
}
}
5、事件响应内容添加完成,为了是程序能够正常运行我们看到WidgetButtonActivity.java中除了前面已经定义的资源还使用了R.drawable.widget_button_pure_color 和 R.drawable.widget_button_drawable。下面是个文件的内容:
5.1 widget_button_pure_color.xml
[html]
<?xml version="1.0" encoding="utf-8"?>
<selector xmlns:android="http://schemas.android.com/apk/res/android" android:enterFadeDuration="300" android:exitFadeDuration="300">
<item android:drawable="@color/button_normal_color" android:state_window_focused="false"/>
<item android:drawable="@color/button_focused_color" android:state_focused="true"/>
<item android:drawable="@color/button_pressed_color" android:state_pressed="true"/>
<item android:drawable="@color/button_normal_color" android:state_enabled="true"/>
</selector>
5.2 widget_button_drawable.xml
[html]
<?xml version="1.0" encoding="utf-8"?>
<selector xmlns:android="http://schemas.android.com/apk/res/android" android:enterFadeDuration="300" android:exitFadeDuration="300" android:variablePadding="true">
<item android:drawable="@drawable/button_bg_normal" android:state_window_focused="false"/>
<item android:drawable="@drawable/button_bg_focused" android:state_focused="true"/>
<item android:drawable="@drawable/button_bg_pressed" android:state_pressed="true"/>
<item android:drawable="@drawable/button_bg_normal" android:state_enabled="true"/>
</selector>
代码中使用到了button_bg_normal 、button_bg_focused 、button_bg_pressed 三个文件,他们都在drawable目录下创建。一下是他们的内容,
button_bg_normal.xml
[html]
<?xml version="1.0" encoding="utf-8"?>
<shape xmlns:android="http://schemas.android.com/apk/res/android"
android:shape="rectangle" >
<gradient
android:startColor="@color/button_drawable_normal_start"
android:centerColor="@color/button_drawable_normal_center"
android:endColor="@color/button_drawable_normal_end"
android:angle="90"
android:type="linear"/>
</shape>
button_bg_focused.xml
[html]
<?xml version="1.0" encoding="utf-8"?>
<shape xmlns:android="http://schemas.android.com/apk/res/android"
android:shape="rectangle" >
<gradient
android:startColor="@color/button_drawable_focused_start"
android:centerColor="@color/button_drawable_focused_center"
android:endColor="@color/button_drawable_focused_end"
android:angle="90"
android:type="linear"/>
</shape>
button_bg_pressed.xml
[html]
<?xml version="1.0" encoding="utf-8"?>
<shape xmlns:android="http://schemas.android.com/apk/res/android"
android:shape="rectangle" >
<gradient
android:startColor="@color/button_drawable_pressed_start"
android:centerColor="@color/button_drawable_pressed_center"
android:endColor="@color/button_drawable_pressed_end"
android:angle="90"
android:type="linear"/>
</shape>
自定义button背景到这里就结束了。下一个控件EditText。
>更多相关文章
首页推荐


佛山市东联科技有限公司一直秉承“一切以用户价值为依归
- 01-11全球最受赞誉公司揭晓:苹果连续九年第一
- 12-09罗伯特·莫里斯:让黑客真正变黑
- 12-09谁闯入了中国网络?揭秘美国绝密黑客小组TA
- 12-09警示:iOS6 惊现“闪退”BUG
- 04-29通用智能人“通通”亮相中关村论坛
- 04-29拼多多投入45亿补贴,助力上海“五五购物节
- 04-29通义千问再开源 推出最大尺寸1100亿参数模型
- 04-29【环球视线】比亚迪交付首列出海云轨
- 04-21中国产品数字护照体系加速建设
相关文章


24小时热门资讯
24小时回复排行
热门推荐


最新资讯


操作系统
黑客防御


 粤公网安备 44060402001498号